
September 20, 2025 by
David Allen
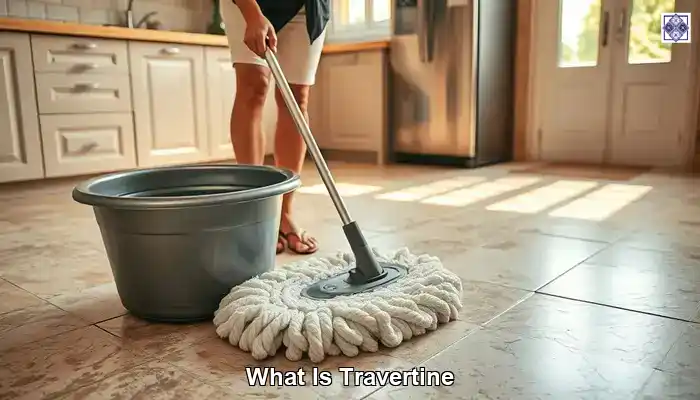
Travertine, a stunning natural stone, originates from limestone formed through mineral deposits in hot springs. It’s not just a pretty face; this ancient rock is a testament to time, offering both durability and character. Travertine’s unique texture and rich colour variations—ranging from soft beige to earthy browns—add a touch of elegance to any home. In UK homes, this stone has become increasingly popular for flooring, countertops, and even outdoor patios. Its ability to withstand wear while providing a classic aesthetic makes it a go-to choice for homeowners looking for a balance between beauty and functionality.
 Fila Pro Floor Cleaner |  LTP Floorshine |  Vileda H2PrO Spin Mop System |
Understanding the composition of travertine is crucial for those pondering, Can I restore my travertine floor myself? This stone is relatively porous compared to other flooring options, meaning it can absorb liquids and stain more easily. However, with regular maintenance and proper care, travertine can maintain its stunning appearance for decades.
With such a rich history and unique characteristics, travertine floors are more than just a surface to walk on; they tell a story. This stone has been used since ancient times, from the grand villas of Rome to modern British homes. Its versatility makes it suitable for various styles, from rustic country kitchens to sleek, contemporary bathrooms.
When delving into the world of travertine flooring, you’ll discover that it comes in several finishes, each offering a distinct look and feel. The most common types available in the UK include honed, polished, and tumbled finishes. The honed finish provides a smooth surface with a matte appearance, making it ideal for those seeking a contemporary look. It’s less slippery than polished travertine, making it a safer choice for families with children or elderly residents.
Polished travertine, on the other hand, boasts a shiny, reflective surface that exudes luxury. However, this finish requires meticulous care, as it can be more susceptible to scratching and staining. If you’re asking, ‘Can I restore my travertine floor myself?’ consider the finish you have. A polished floor may need professional assistance to regain its lustre without causing damage.
Tumbled travertine offers a more rustic and aged appearance, characterised by its uneven surface and natural edges. This finish is ideal for creating a charming, lived-in look, particularly in country homes or traditional settings. Each type of finish requires different maintenance techniques, so understanding these nuances is vital before embarking on your restoration journey.
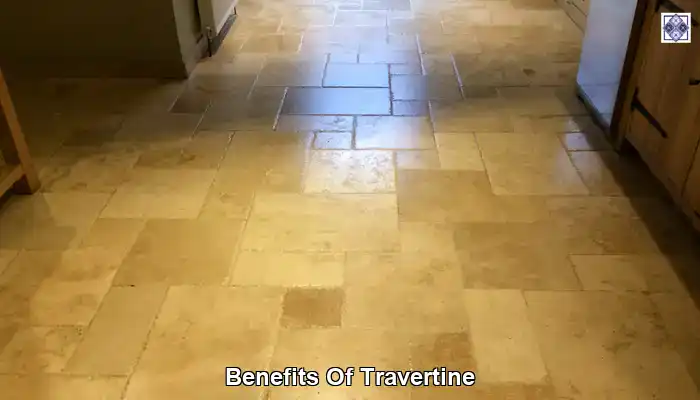
Travertine is not just a visually appealing stone; it offers numerous benefits for UK homes. Its durability is second to none, standing up to heavy foot traffic without breaking a sweat. This resilience is particularly advantageous in busy households where floors endure constant wear and tear.
One often-overlooked benefit is its thermal properties. Travertine remains cool underfoot, making it an excellent choice for warmer months or homes with underfloor heating systems. This feature is especially appreciated in the UK, where our unpredictable weather often calls for both style and comfort.
The aesthetic appeal of travertine cannot be overstated. Its natural variations in colour and texture lend an organic charm that can elevate any space. Whether you’re in a modern flat in London or a quaint cottage in the Cotswolds, travertine flooring can seamlessly blend with your home’s design ethos. Plus, it’s environmentally friendly, being a natural stone that doesn’t require energy-intensive manufacturing processes, ensuring your home is as sustainable as it is stylish.
Installing travertine flooring is a committed venture that can yield stunning results when done correctly. The installation process involves rigorous preparation, which includes selecting the right adhesive and grout for travertine. Remember, moisture is a key concern in UK homes, so proper sealing before installation is paramount. This prevents water damage and maintains the integrity of the stone.
Many UK homeowners choose to hire professionals for installation, especially if they’re unsure about the process. However, if you’re keen on going the DIY route, ensure that you follow detailed guidelines. Level the subfloor, apply a quality adhesive, and ensure each tile is spaced correctly for a uniform look.
After laying the tiles, grouting is the next critical step. The grout colour can affect the overall appearance, so choose wisely! Once grouted, it’s essential to seal the floor properly. This will protect your travertine from stains and moisture, ensuring it remains a beautiful feature in your home for years to come.
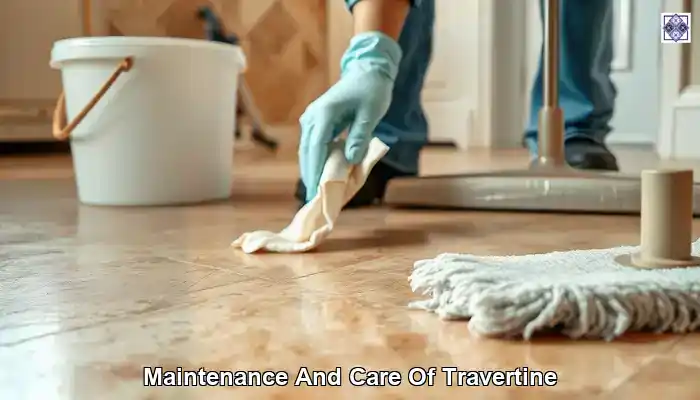
To keep your travertine looking its best, regular maintenance is essential. A simple cleaning routine can make a world of difference. Opt for a pH-neutral cleaner—this protects the stone from acidic substances that can etch the surface. Regular sweeping or vacuuming will help remove dirt and debris that can scratch the surface.
Every few years, it’s wise to reseal your travertine flooring. This restoration step is crucial, especially in the often damp UK climate, where moisture can lead to damage. Resealing creates a protective barrier, keeping stains at bay. The frequency of resealing may vary depending on foot traffic and exposure to moisture, but a good rule of thumb in the UK is every 1-2 years.
Additionally, addressing spills immediately can prevent stains from setting in. Blot—don’t wipe!—the spill with a soft cloth and use a gentle detergent if necessary. For those stubborn stains, consider consulting a professional cleaning service familiar with travertine to prevent further damage. Regular care ensures that your travertine floor remains a stunning feature in your home, showcasing its beauty for years to come.
Inspecting your travertine floor should be an ongoing habit, especially if you want to maintain its pristine condition. Look for signs of wear such as cracks, dullness, or discolouration—these are all indicators that your floor may need some TLC.
Cracks can be particularly concerning. While small fissures may be easily repairable, larger cracks can indicate underlying issues, such as foundation settling or moisture infiltration. If you’re considering restoring your travertine floor yourself, start by assessing the cracks. Minor ones can be filled with a repair kit, but extensive damage might warrant a professional’s touch.
Dullness is another common issue. Over time, even the most beautiful travertine can lose its shine due to foot traffic and the use of abrasive cleaning products. This can be remedied with polishing, but be cautious—using the wrong products can exacerbate the problem. Regular maintenance can prevent dullness, making it easier to keep your travertine looking vibrant.
In the UK, the climate presents unique challenges for travertine flooring. One prevalent issue is moisture damage. Due to our often damp environment, travertine can absorb water, leading to stains or even mould growth if not cared for properly.
If you live in an area that experiences high humidity or frequent rainfall, pay extra attention to how moisture interacts with your floor. Control humidity levels in your home with dehumidifiers, and avoid excess water during cleaning. Understanding your local climate can help you choose the right maintenance plan for your travertine.
Another issue relates to improper installation. If your travertine hasn’t been sealed correctly, or if the subfloor isn’t adequately prepared, you may face problems much sooner than expected. Always consult with a professional if you’re uncertain about the installation process—this can save you money in the long run by avoiding costly repairs.
While DIY projects can be rewarding, there are times when bringing in a professional is the best course of action. If you notice extensive damage to your travertine floor—such as large cracks or significant discolouration—it’s wise to consult a UK-based expert.
Professionals have the experience and tools necessary to assess the issue correctly. They can provide tailored advice and likely have access to restoration techniques that the average homeowner may not be equipped to handle. This is particularly important for those contemplating Whether They Can restore their travertine floor themselves; sometimes, the best DIY option is to know when to call in the cavalry.
Additionally, consider professional help if your travertine floor requires deep cleaning or polishing. These processes can be tricky, and improper methods may cause more harm than good. Investing in a professional cleaning service every few years can extend the life of your travertine, ensuring it continues to shine in your home.
Cleaning is the first step in restoring your travertine floor, and it’s essential to do it right. Start by sweeping or vacuuming to remove dirt and debris—this prevents scratches during the cleaning process. Once the surface is free of loose dirt, prepare a solution of pH-neutral cleaner mixed with warm water.
Using a soft brush or mop, gently scrub the surface, ensuring you don’t use anything abrasive that might damage the stone. For tough stains, apply the cleaning solution directly and allow it to sit for a few minutes before scrubbing. This method is particularly effective for stains caused by food or drink spills.
After cleaning, rinse the floor thoroughly with clean water to remove any residual cleaner. Avoid leaving any standing water on the floor, as travertine is porous and can absorb moisture, leading to further issues down the line. When you’re done, dry the floor with a soft cloth or towel to ensure no water is left behind.
Regular cleaning forms the foundation of your travertine maintenance plan. Implement a routine that includes sweeping or vacuuming several times a week and deep cleaning as needed. This diligence can significantly extend the life and beauty of your travertine flooring.
If your travertine floor shows minor damage—such as small cracks or chips—there’s no need to panic! Repairing these issues yourself is often a straightforward process. Start by purchasing a travertine repair kit from your local home improvement store. These kits typically include a filler that matches the colour of your stone, making it easier to blend repairs seamlessly.
Before applying the filler, clean the damaged area thoroughly to ensure proper adhesion. Once clean, follow the kit’s instructions for mixing and applying the filler. Using a putty knife, carefully fill in the cracks or holes, smoothing the surface to match the surrounding stone.
After the filler has cured, you may need to sand the area lightly to ensure it’s flush with the rest of the floor. Finally, consider resealing the area once the repair is complete, as this will help protect it from future damage.
If the damage is more extensive than you can handle, or if you’re unsure about the process, don’t hesitate to seek professional help. Sometimes it’s better to err on the side of caution, especially when it comes to preserving the integrity of your travertine.
Sealing is an essential step in the restoration of your travertine floor. It creates a protective barrier against stains and moisture, significantly enhancing its durability. Before applying any sealant, ensure that your floor is clean and completely dry. CSelecta sealant is designed explicitly for travertine, providing the best protection.
To apply the sealant, use a clean cloth or a roller, and work in small sections to ensure even coverage. Allow the sealant to penetrate the stone for the time recommended by the manufacturer—typically around 10-20 minutes—before buffing away any excess. This process not only protects but also enhances the natural beauty of your travertine.
Polishing is the final step in your DIY restoration project. Use a high-quality stone polish designed for travertine to restore that coveted shine. Apply a thin layer of polish with a soft cloth, buffing it gently into the stone. This helps to enhance the colour and texture, making your floor look brand new.
Regularly resealing and polishing your travertine floor will keep it looking its best, ensuring that your restoration efforts are not just temporary fixes but contribute to the long-term beauty of your home.
Before diving into your travertine restoration project, it’s crucial to gather the right tools and materials. Start with the basics: a bucket, a soft brush, and a pH-neutral cleaner. These items are vital for effective cleaning without damaging the stone. The bucket is essential for mixing your cleaning solution, while the soft brush allows for gentle scrubbing, removing dirt without scratching the surface.
Consider investing in a mop designed for natural stone floors. A microfiber mop can pick up dirt and grime without the abrasive qualities of traditional mops, making it an excellent addition to your cleaning supplies.
In addition to these essentials, having towels on hand will help with drying the floor after cleaning. Water left on travertine can lead to unsightly stains, so prompt drying is key. Make sure to choose towels that are soft and non-abrasive to avoid scratching the stone’s surface.
Lastly, keep a small vacuum cleaner or handheld vacuum for regular maintenance. This tool will help you quickly remove dust and debris, preventing buildup that could harm your travertine over time.
To tackle minor damages to your travertine floor, a quality repair kit is indispensable. These kits typically include everything you need to repair cracks and chips, including colour-matched fillers that blend seamlessly with your stone. When shopping for a repair kit in UK stores, ensure it’s designed explicitly for travertine to guarantee the best results.
Besides the filler, many kits come with application tools, such as putty knives or applicators, making it easier to achieve a smooth finish. Having these tools on hand will save you time and frustration during the repair process.
When applying filler, make sure to follow the kit’s instructions closely. Pay attention to curing times, as these can affect the final result. A well-applied filler can make cracks nearly invisible, restoring your floor’s aesthetic appeal.
Don’t forget to keep a small supply of sandpaper as well. After the filler has cured, you may need to sand the area lightly to ensure it’s flush with the surrounding surface. This step is crucial for a smooth and professional-looking repair.
Choosing the proper sealant and polish is crucial for maintaining the beauty and longevity of your travertine flooring. In the UK market, you’ll find a variety of options tailored specifically for natural stone. A high-quality penetrating sealant is ideal, as it will protect against moisture and stains while allowing the stone to breathe.
When selecting a sealant, consider the specific needs of your travertine—such as its finish and the level of foot traffic it endures. Some sealants offer enhanced stain resistance, which can be incredibly beneficial in high-traffic areas.
For polishing, look for products designed explicitly for travertine. These polishes can bring back the shine and depth of colour while also providing a protective layer. Just like with sealants, ensure that the polish is compatible with your travertine’s finish for the best results.
Always follow the manufacturer’s instructions for both sealants and polishes, as application techniques can vary. Having these quality products on hand will ensure that your restoration efforts are effective and long-lasting.
Safety should be your top priority when embarking on a DIY restoration project. Start by wearing gloves and protective eyewear to shield yourself from harsh chemicals that may be present in cleaners and sealers. This simple precaution can prevent irritation and injury, ensuring a safer working environment.
Before you begin, cover any furniture or items in the area to protect them from dust and potential spills. Using drop cloths or plastic sheeting can save you from a lot of cleanup later. This is especially important in high-traffic areas where dust and debris may accumulate.
When working with sealants or polishes, ensure that the area is well-ventilated. Open windows and doors to promote airflow, reducing the risk of inhaling potentially harmful fumes. Additionally, consider wearing a mask if you’re sensitive to such products; your health should never be compromised for the sake of a beautiful floor.
Lastly, be mindful of your footing while working on the floor. Travertine can become slippery when wet, so take care to avoid slipping or falling during the cleaning and restoration processes.
Using cleaning and sealing products safely is crucial to a successful restoration. Always read labels and follow the manufacturer’s instructions, especially concerning ventilation and protective equipment. Many commercial cleaners and sealers contain strong chemicals that can cause skin irritation or respiratory issues if mishandled.
When mixing cleaning solutions, always do so in a well-ventilated area. If you’re using a concentrated product, consider diluting it in a separate container first before applying it to your travertine. This approach reduces the risk of spills and makes it easier to manage the amount of cleaner you use.
Keep all cleaning supplies out of reach of children and pets, ensuring they cannot accidentally ingest or come into contact with harmful substances. Using clear, labelled containers can help everyone in your home understand what’s safe and what isn’t.
If you’re ever unsure about a product’s safety, don’t hesitate to consult with the retailer or manufacturer. They can provide insight into the product’s components, helping you make informed decisions.
In your journey to restore travertine, it’s essential to sidestep common pitfalls that can lead to subpar results. One of the biggest mistakes homeowners make is using acidic cleaners or products not designed for natural stone. These can etch and damage the surface, leading to costly repairs.
Always stick to pH-neutral cleaners formulated explicitly for travertine. These products are designed to clean effectively without compromising the stone’s integrity. When in doubt, test a small, inconspicuous area first to ensure compatibility.
Another standard error is neglecting to reseal your travertine floor regularly. Skipping this essential maintenance step can lead to stains and moisture damage, which can become irreversible over time. Make a note on your calendar to remind yourself when it’s time to reseal, ensuring your beautiful floor is protected.
Finally, don’t rush the drying process after cleaning or sealing. Allow adequate time for each product to dry completely before walking on the floor. This patience is key to achieving the best results.
Ventilation is a critical aspect of any home improvement project, particularly when working with chemicals. Proper airflow helps reduce the concentration of fumes, making your work area safer and more comfortable. Open windows, doors, and use fans to circulate air throughout the space.
If your home lacks sufficient ventilation, consider wearing a mask designed for chemical protection to safeguard against inhaling harmful particles. Additionally, take breaks during your restoration project—stepping outside for fresh air can help clear your lungs and revitalise your focus.
If the chemicals you’re using have strong odours, try to limit your time in the area until the fumes dissipate. This approach not only protects your health but also enables you to work more effectively without distractions from lingering smells.
Proper ventilation is a small but vital detail that can significantly affect your restoration experience. Make it a priority to keep air flowing freely in your workspace, allowing you to focus on making your travertine floor shine once more.
Once your travertine floor is restored, establishing a regular cleaning routine is essential to maintaining its beauty. Start by sweeping or vacuuming at least once a week to remove dirt, dust, and debris. This simple step prevents scratching and keeps your floor looking fresh.
For deeper cleaning, use a pH-neutral cleaner mixed with water. Mop the floor with a microfiber mop to avoid scratching the surface. Make sure to rinse the mop frequently, preventing dirt from being redeposited onto the floor. After mopping, dry the area thoroughly with a soft cloth or towel to avoid moisture damage.
Implementing a regular cleaning schedule not only keeps your travertine looking pristine but also helps identify issues before they escalate. If you notice any stains or discolouration, address them immediately with appropriate cleaners or a professional service. Your diligence will pay off in the long run, ensuring that your investment remains beautiful and resilient.
Preventing future damage to your travertine floor is just as important as cleaning it. Consider placing mats at entryways to catch dirt and moisture before it reaches your floors. This precaution can significantly reduce the amount of grime that gets ground into the stone.
Use coasters under plants or decorative items to prevent moisture rings or scratches. This small step can save you from unsightly marks that could become permanent over time. Additionally, consider using area rugs in high-traffic zones, providing an extra layer of protection against wear and tear.
When moving furniture, lift rather than drag to avoid scratching the surface. For heavy pieces, consider using furniture sliders, which can make moving items easier and safeguard your travertine floor.
Lastly, educate your family about the importance of proper care for the travertine. Simple habits can go a long way in preserving the beauty of your floors.
In the UK, resealing your travertine floor every 1-2 years is advisable. The frequency of resealing may depend on the level of foot traffic and the specific sealant used. If your floor starts to appear dull or if water isn’t beading on the surface, it’s time for a reseal.
Before resealing, ensure the floor is clean and dry. Following the instructions on your sealant carefully is crucial for achieving optimal results. Apply the sealant evenly, working in small sections to ensure thorough coverage.
After applying the sealant, avoid walking on the floor for at least 24 hours. This waiting period allows the adhesive to cure properly, ensuring maximum protection. Regular resealing will help prevent staining and moisture issues, keeping your travertine looking its best for years to come.
Stains can be a frustrating reality for travertine floor owners, but prompt action can make all the difference. If you spill something on your floor, act quickly! Blot—do not wipe—any excess liquid immediately with a soft cloth to prevent it from soaking in.
For stubborn stains, create a paste using baking soda and water. Apply the paste to the affected area and cover it with plastic wrap. Allow it to sit for several hours or overnight; this method helps draw the stain out of the stone. Afterwards, rinse the area thoroughly with water and dry it well.
For tougher stains, such as oil or wine, consider using a dedicated stone cleaner explicitly designed for travertine. Always test a small, inconspicuous area first to ensure that the cleaner won’t cause damage.
If stains persist despite your best efforts, don’t hesitate to consult a professional cleaner who specialises in travertine. They can provide the expertise needed to tackle challenging stains without harming the stone.
While DIY restoration and maintenance are essential, enlisting professional help every few years can ensure your travertine remains in top condition. Professionals have access to high-quality equipment and techniques that can provide a deeper clean and more effective restoration than what’s typically achievable at home.
Consider scheduling a professional cleaning service every 2-3 years, especially if your travertine is in a high-traffic area. These experts can remove embedded dirt and restore the sheen of your floor, leaving it looking as good as new.
Additionally, professionals can assess any damage you may have overlooked, providing tailored advice for your specific travertine. This proactive approach can help you avoid costly repairs down the line, ensuring that your investment continues to shine in your home.
Yes, many aspects of travertine restoration can be done yourself, such as cleaning and minor repairs. However, extensive damage may require professional help.
Regular cleaning should be done weekly, while deeper cleaning can be scheduled every few months, depending on foot traffic and usage.
Use a pH-neutral cleaner with a soft brush or microfiber mop to avoid scratching the surface. Rinse thoroughly and dry to prevent moisture damage.
Place mats at entry points and use coasters under items. Clean spills promptly to prevent them from setting into the stone.
In the UK, resealing should be done every 1-2 years, depending on foot traffic and the type of sealant used.
No, acidic cleaners can etch and damage travertine. Always use pH-neutral products designed for natural stone.
For deep scratches, consider using a repair kit specifically for travertine. If the damage is extensive, consult a professional.
Yes, travertine can be slippery when wet. Use mats in areas prone to moisture to reduce slipping hazards.
Use a high-quality stone polish designed for travertine to restore its shine. Regular maintenance can also help maintain lustre.
Yes, professional maintenance can provide deeper cleaning and expert assessments that can extend the life and beauty of your travertine flooring.